Integrating ChatBob with your Webflow website.
Chatbots, like ChatBob, can be a game-changer for your website. They answer queries when you're offline, aid visitors in making purchases, and acquire potential leads. This guide is designed to help use ChatBob to add a chatbot to Webflow.
Webflow is a unique platform that allows designers to craft responsive websites using a browser-based visual editor. As you design, Webflow automatically creates the HTML, CSS, and JavaScript for you.
To embed ChatBob into your Webflow website, follow these instructions:
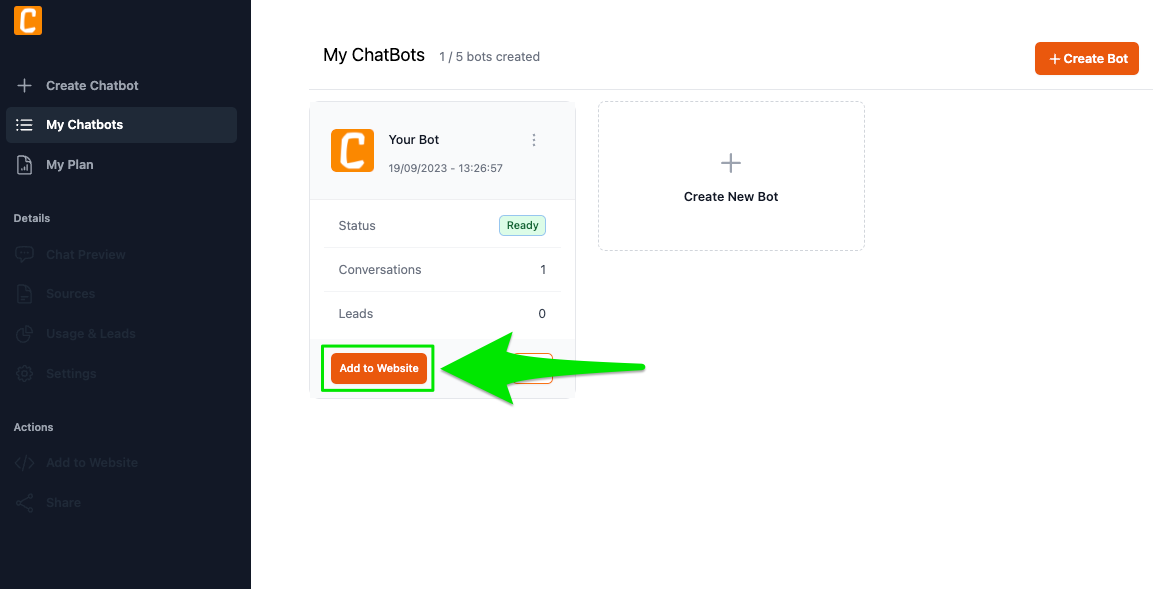
- Go to your ChatBob dashboard and create a bot if you haven't already.
- Once your bot has finished creating, select the "Add to Website" button.
- In the pop-up that appears, copy the
<script...code by clicking the copy icon.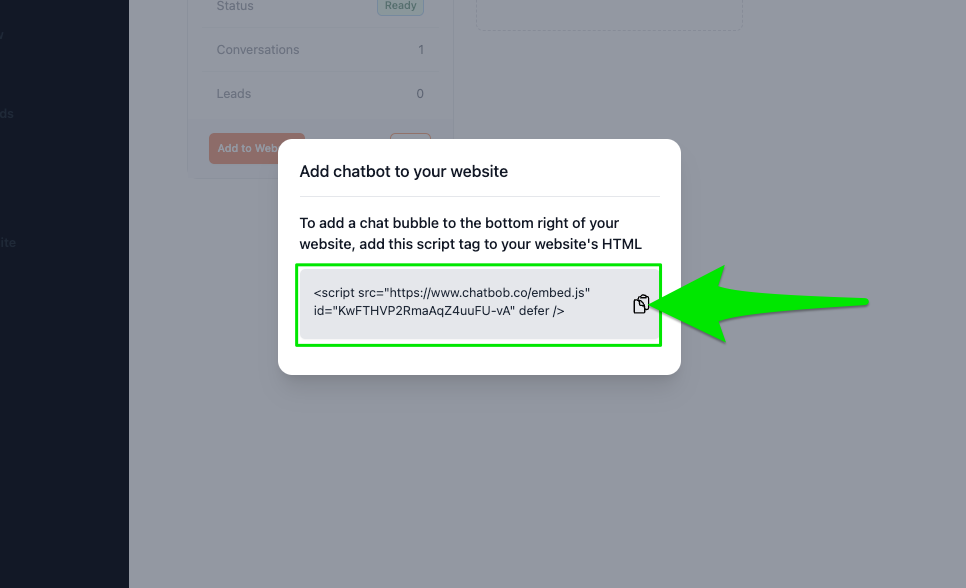
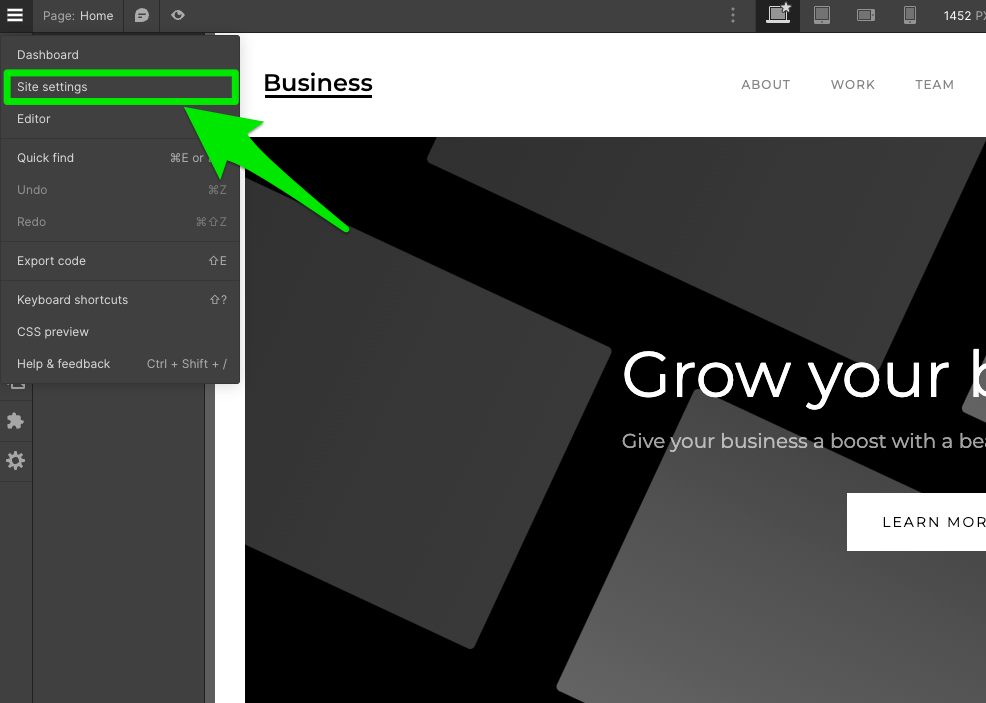
- Now go to Webflow. In the website editor, open the menu on the top left and go to "Site settings".
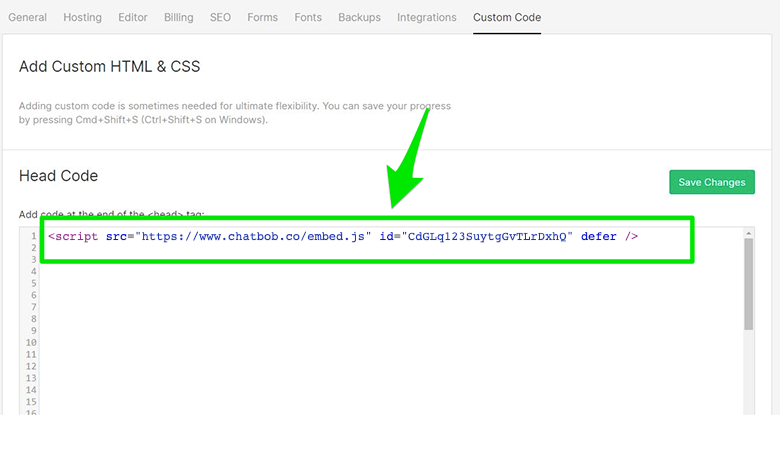
- In the settings menu go to "Custom Code"
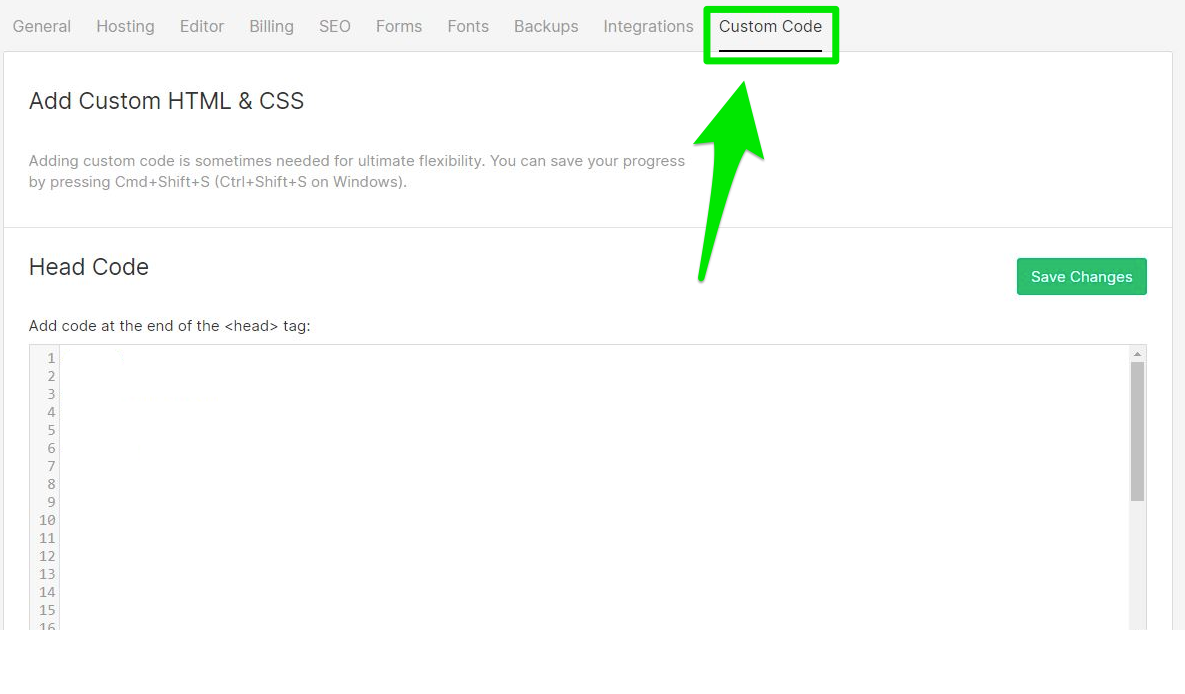
- Finally, enter the script tag copied in step 3 in the "Head" section and click "Save".
- The bot should now appear on your page.