Adding a chatbot to your Wix website.
Having a chatbot like ChatBob on your site can be a great asset. It can respond to queries when you're not available, guide users, and attract new leads. If you're using Wix, here's how to make it work.
Wix is known for its intuitive website building tools. It offers a range of customizable templates, as well as drag-and-drop features, custom apps and an included graphics gallery.
Here's how to get ChatBob running on your Wix site:
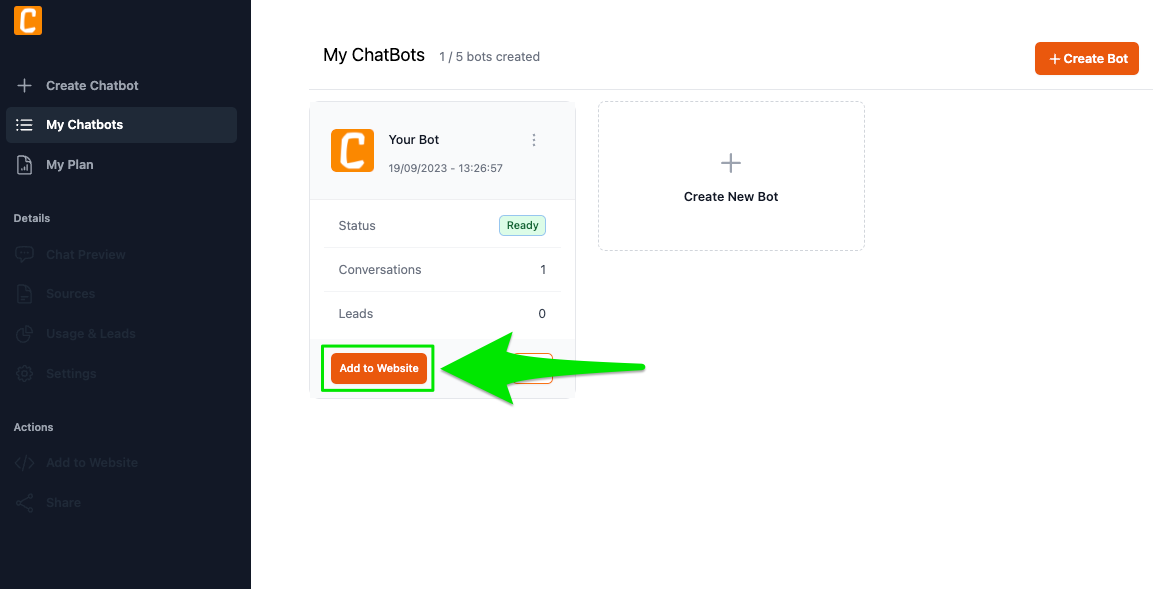
- Go to your ChatBob dashboard and create a bot if you haven't already.
- Once your bot has finished creating, select the "Add to Website" button.
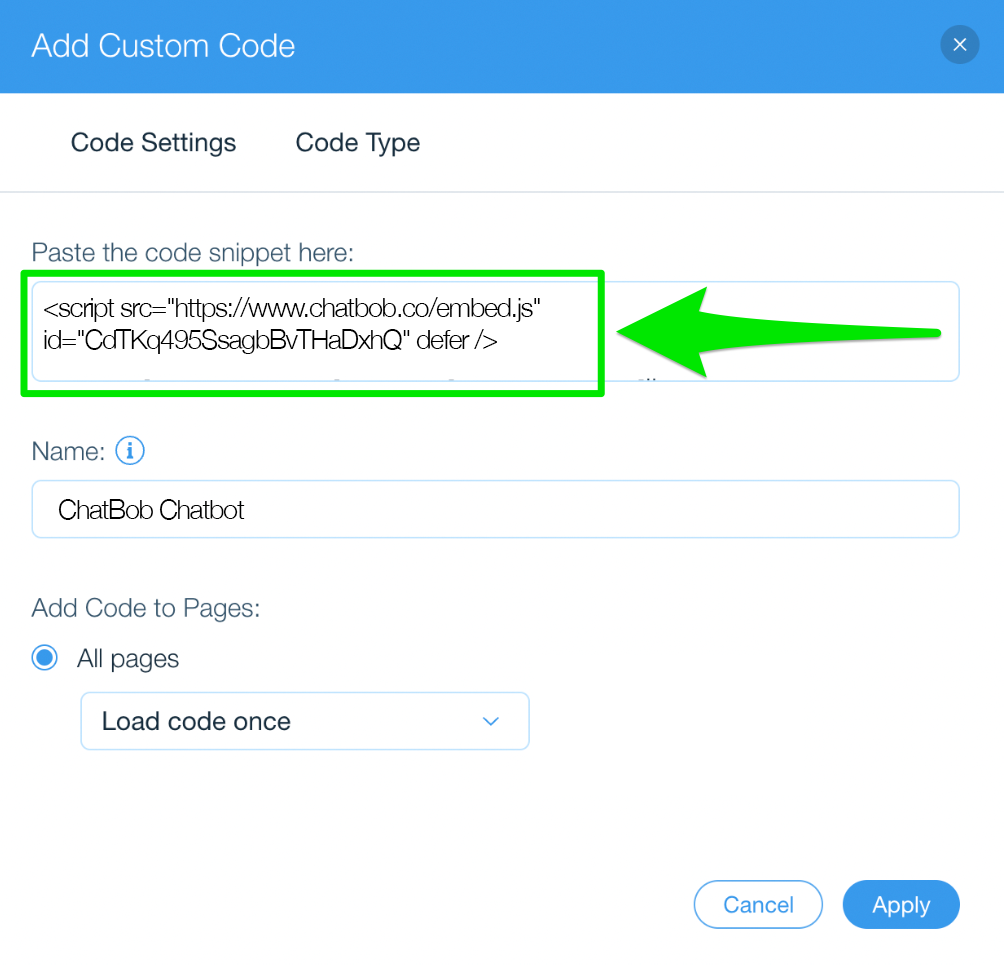
- In the pop-up that appears, copy the
<script...code by clicking the copy icon.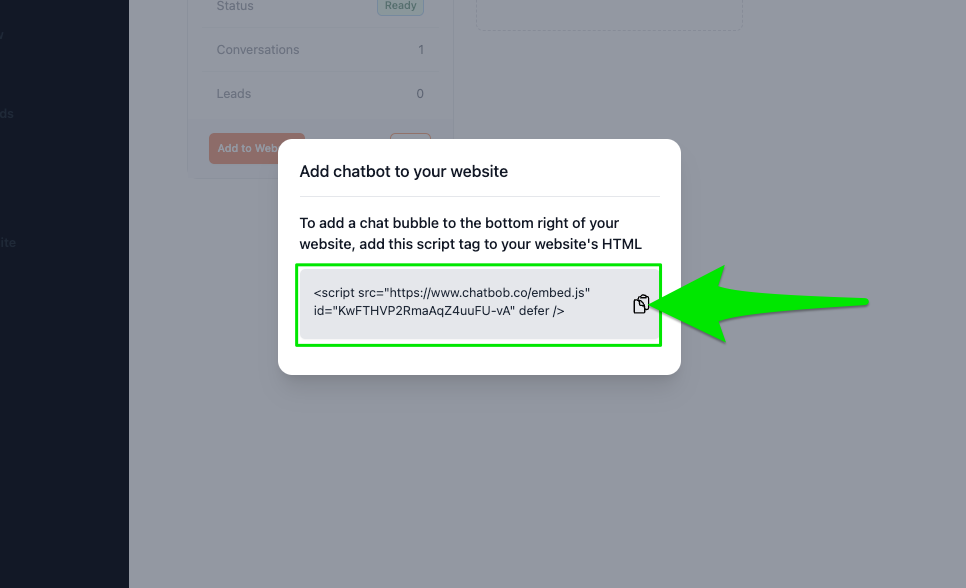
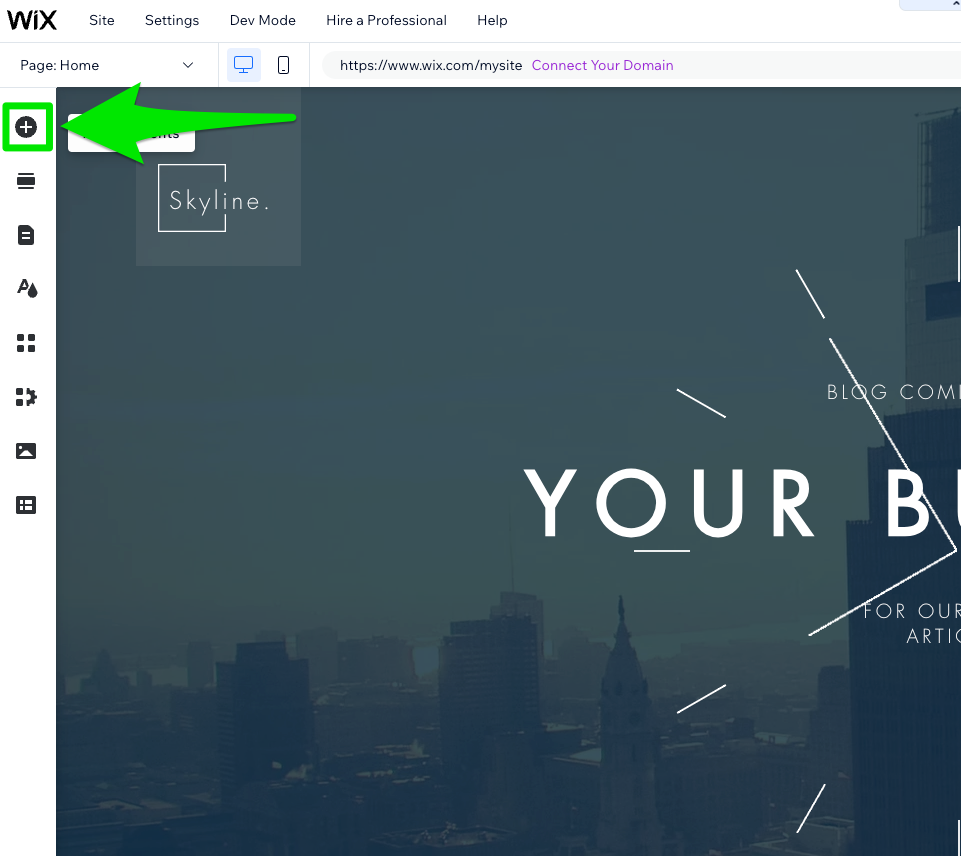
- Now go to Wix. In the website editor, select the plus icon labeled "Add Elements".
- In the menu navigate to 'Embed Code > Marketing Tools > Custom Code'

- Select "Add Code" in the "Head" part of the Custom Code menu.
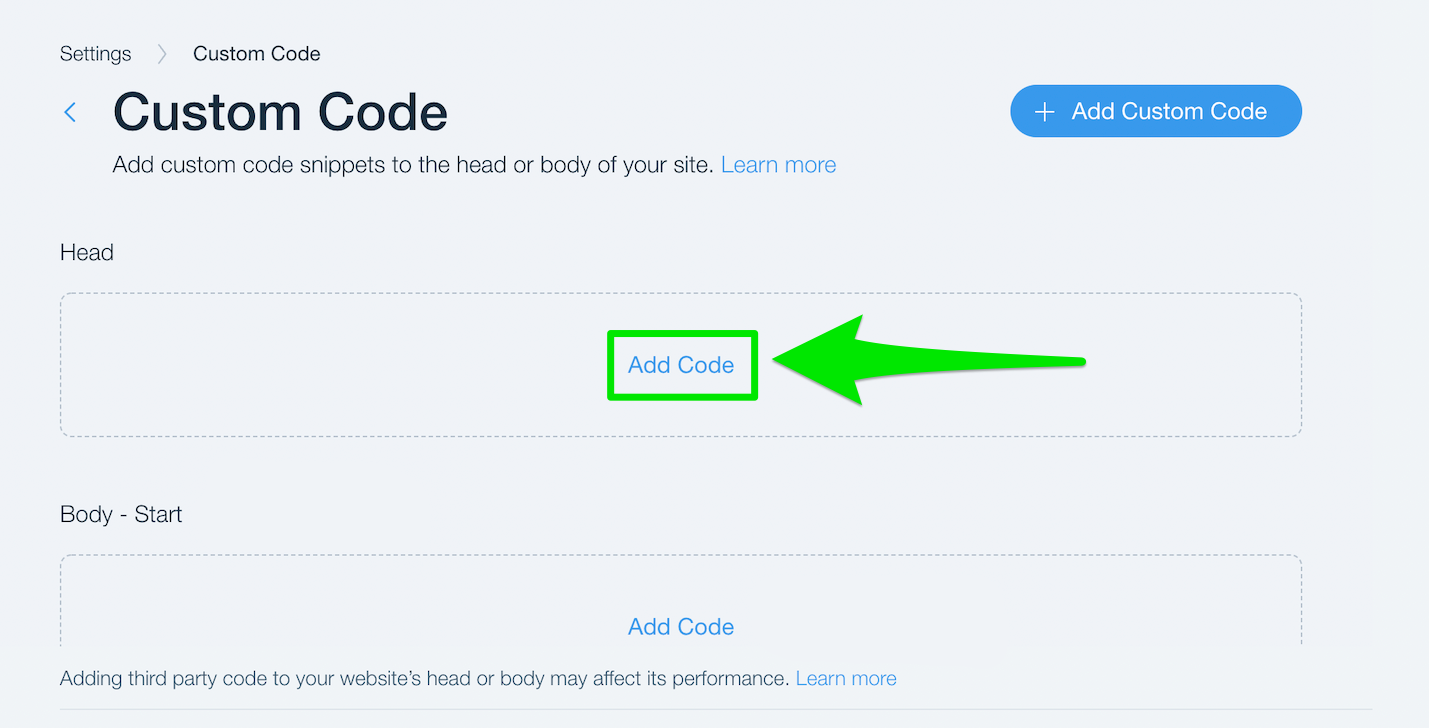
- Fill the script tag copied in step 3 into the Code Snippet section.
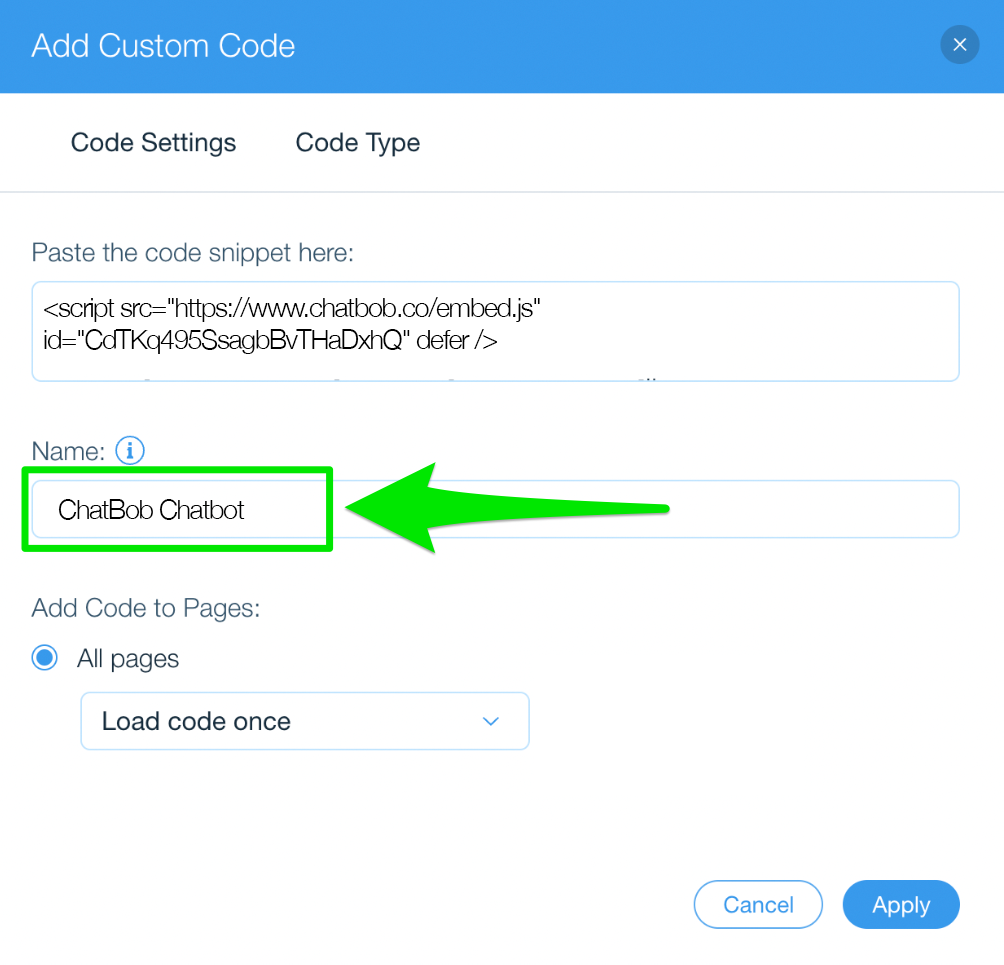
- Fill a descriptive name like "ChatBob Chatbot" into the Name field.
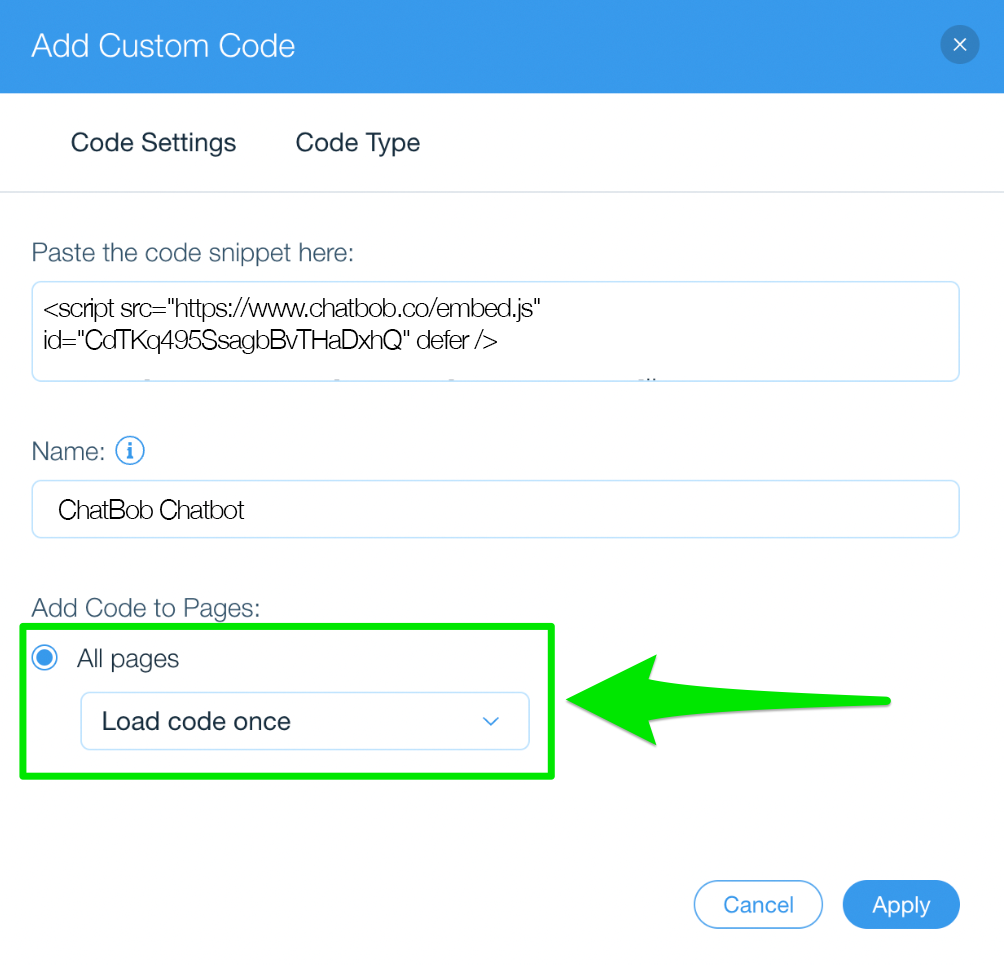
- Finally, select "All Pages" and "Load code once" and click "Apply"
- The bot should now appear on your page.